Mask Keeper - Free Pattern
- Darae
- Dec 1, 2020
- 3 min read

It's December, which means there's little time left to make handmade gifts — for others, or yourself! The Mask Keeper is an easily accessible way to keep your mask clean, flat, and will help to avoid all that pesky fiddling.
Where do you keep your mask? I used to keep mine in the slip pocket inside my bag, but it got all crumpled up. I needed a dedicated place to keep it flat with an easy access. I made several Mask Keepers, and narrowed down to two: one with a snap closure, and another one with an elastic closure. I think they both work very well.
I would like to let you know that I’m thankful for you and your support for Indigobird. Every time you try out a tutorial or a pattern, you‘re helping my small business thrive. There would be no Indigobird without you, so thank you!
No matter what your plans may be for this holiday season, I hope it’s safe and a happy one!
Kindly,


Mask Keeper by Indigobird
Download template
Materials:
Exterior fabric : 11.5" wide x 7"high [29cm x 18cm]
Lining fabric : 11.5" wide x 7" high [29cm x 18cm]
Interfacing : 11.5" wide x 7" high [29cm x 18cm]
Pocket fabric : 7" x 7" [18cm x 18cm]
Binding Fabric: 1.5" x 33" [3,8cm x 84cm]
1 set of of KAM Snap buttons ( Size 20/12mm/T5) OR 10" [25cm] long elastic
I used Pellon's Peltex #71 for this project. Alternative interfacings are listed below.
VLIESELINE / VILENE : S520 or S80
Finished Size :
5.5"W x 6.75"H [14cm x 17cm]
Tutorial :

1. Cut fabrics and interfacing to size.
2. Fuse the interfacing to the wrong side of the Exterior fabric.

3. Using a hera marker or water soluble pen, mark stitching lines. For my Mask Keeper, I drew lines 1" apart vertically and diagonally.
4. Arrange the Lining fabric and the Exterior fabric, wrong sides together, with interfacing sandwiched in between.

5. Stitch through all layers (exterior, interfacing, & lining).
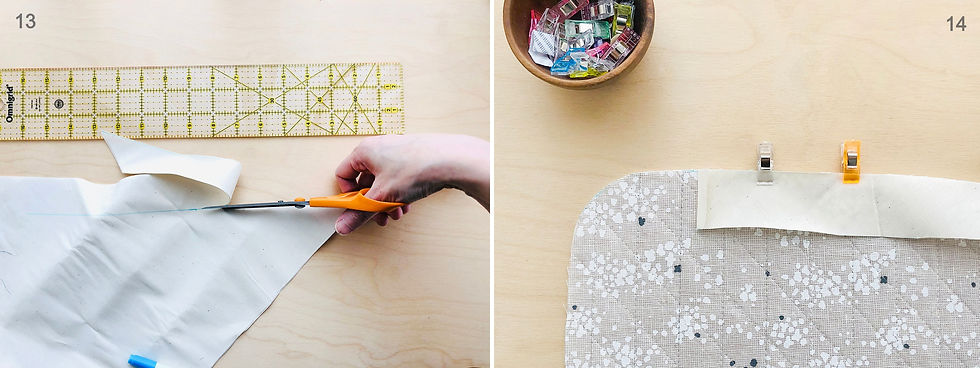
6. Place the template over the assembled Mask Keeper, and trace the shape.

7. Cut along the marked line and set it aside.
8. Fold the Pocket fabric in half, wrong sides together.

9. Place the Pocket fabric under the Mask Keeper. Center & align the raw edges and hold them together with a clip.
10. Trace the curved corner onto the Pocket fabric and and carefully cut it out. Repeat for the other side.

11. Place the Pocket piece on the Lining side. Secure it in place using Wonder clips.
12. Baste with an 1/8"[3mm] seam allowance.
13. Cut fabric on a bias (45 degrees to the grain) 1.5”wide x 33"long [3,8cm x 84cm].
14. Start pinning the bias tape to the Mask Keeper, right sides facing. Fold the short end of the bias tape by 1/4"[6mm] towards the wrong side.

15. When pinning around the curved corner, try not to stretch the tape.
16. Sew through all layers with 1/4" [6mm] seam allowance. Use small stitches when going around the curve.

17. When you get close to the start of the bias tape, make sure that the tail end of the tape overlaps the folded edge by 1/4"[6mm] or more.
18. Trim the bias tape as required and finish sewing.

19. Turn the bias tape over toward the lining side.
20. Stretch the bias tape at the curved corners. This makes it easy to fold later on.

21. Fold the raw edge of the bias tape toward the wrong side aligning it with the raw edge of the Mask Keeper. Then fold again, covering the stitches that you have just made in the previous step. Make sure that the stitches are covered!
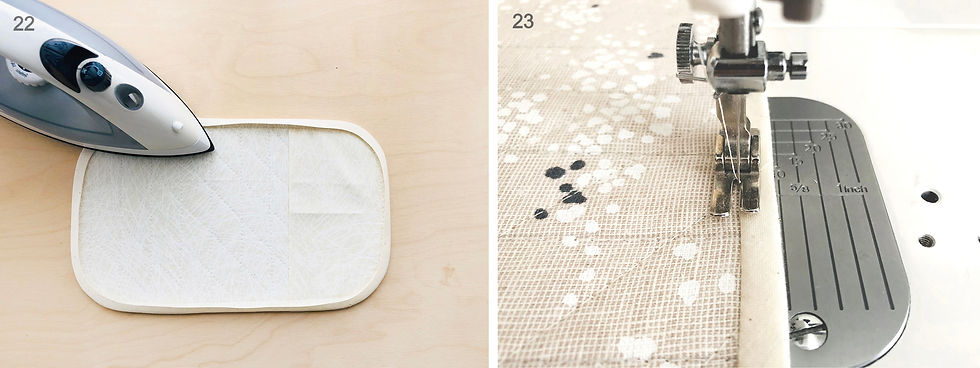
22. Press to smooth out the fold at the curved corners. With proper ironing you won't even need the clips!
23. Turn the Mask Keeper exterior side up and stitch-in-the-ditch at the seam, all the way around (alternatively, you can hand stitch binding down along interior fabric lining).

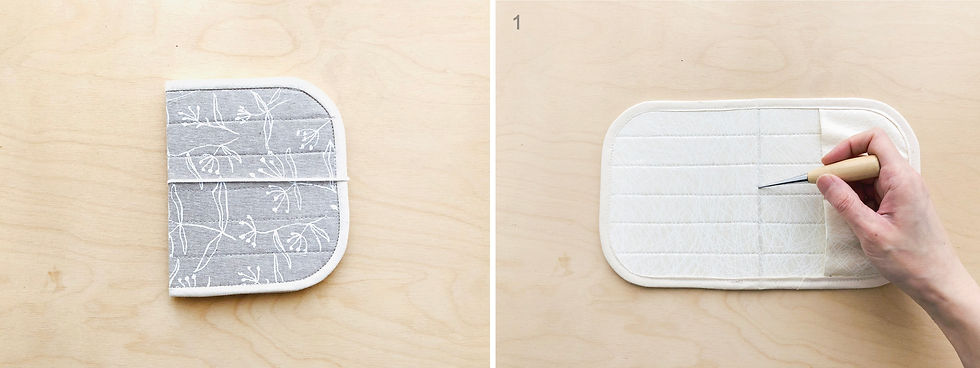
24. Fold the Mask Keeper in half and press.
25. Place the template over the Mask Keeper and use an awl to punch through the fabric at the + mark.

26. Use a KAM Snap setting tool to install the snaps. KAM Snap tutorial is available HERE.
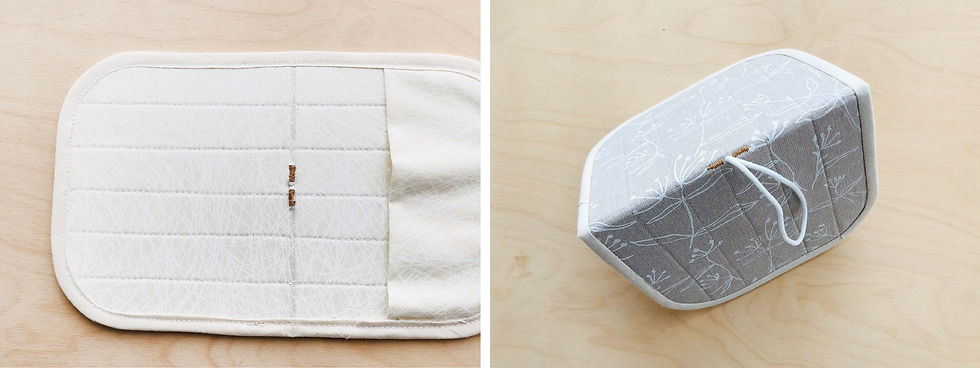
VERSION 2 - Using elastic instead of snaps.
1. Make a hole through the centre of the Mask Keeper using an awl.
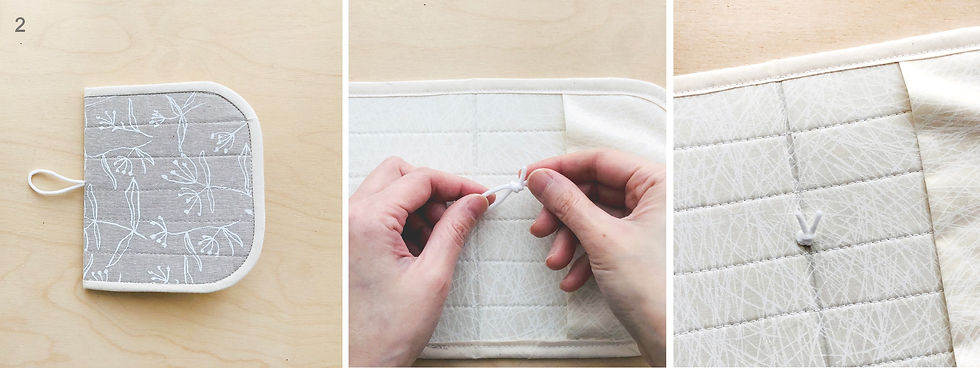
2. Thread the elastic through the hole and tie a knot.
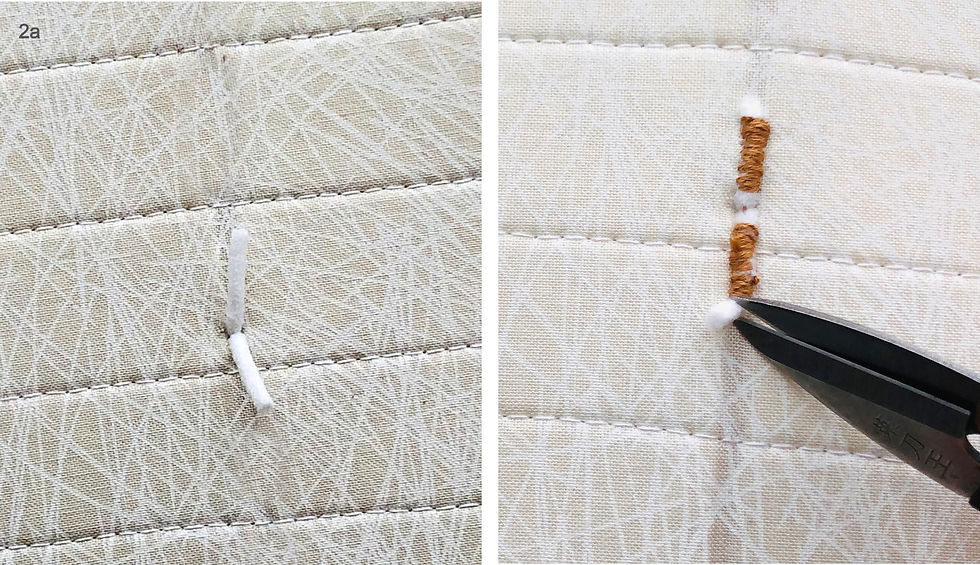
2a. Or, lay the elastic ends flat and zigzag stitch by machine or hand stitch to secure it in place. As stitches will be visible on both sides, use matching or contrasting thread of choice. Trim the ends of the elastic with sharp scissors.
Please tag your photo #MASKKEEPER #INDIGOBIRDDESIGN when sharing in social media. Thank you!


Comments